 Cart(
Cart(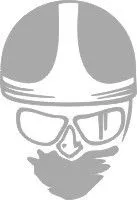
This classic head graphic is cut from long lasting outdoor vinyl and can be used on bikes, cars, windows, etc.... The graphics are cut and therefore only the graphic is applied to the required surface, so the background colour will be dependent upon the colour of the surface that the graphic is applied i.e. if the base surface colour is white and the graphic is black you will end up with a black and white graphic.
Each decal has three pieces:
1. The top layer is the transfer tape or pre-mask.
2. The middle layer is the actual vinyl decal.
3. The bottom layer is the backing.
These decals come to you all together in three layers.
The top layer is called transfer tape or pre-mask. It looks somewhat like regular masking tape or clear tape. And is used to apply and protect you decal as you apply. The middle layer is the actual decal. And this will come up with your transfer tape when your ready to apply. The bottom layer is a backing paper with a waxy surface.
Firstly rub the transfer tape and then peel back, this will remove the graphic from the backing you can then move the graphic to the area you would like to apply it to, try to be as careful as possible with the location as you will not get a second chance! Place the transfer tape with the graphic attached to it on the surface and rub, be careful and take your time when removing the transfer tape to ensure that the whole graphic has stuck to the required surface if you do it to quickly you may rip the graphic. If the graphic has not stuck in all places give it another rub to ensure it has adhered properly and continue removing the tape. You can then remove the transfer tape, you should now be left with just the graphic on the surface you have selected.


